FIESTA; A PARTY PLANNING SOFTWARE
What inspired me to make this project? I have always enjoyed event planning yet I always found it frustrating that there were virtually no tools to help with the process. I was curious if others shared my point of view, and if so, how could i make a product that would solve their pain points?
Skills Used:
Paper Prototyping
High-Fidelity Prototyping
Responsive Design
Research
User Testing
Mood-Boarding
Wire Framing
Paper Prototyping
High-Fidelity Prototyping
Responsive Design
Part 1: Research
Survey
To find out a little bit more about users' frustrations (if any) with event planning, I created a survey. Some questions on my survey included:
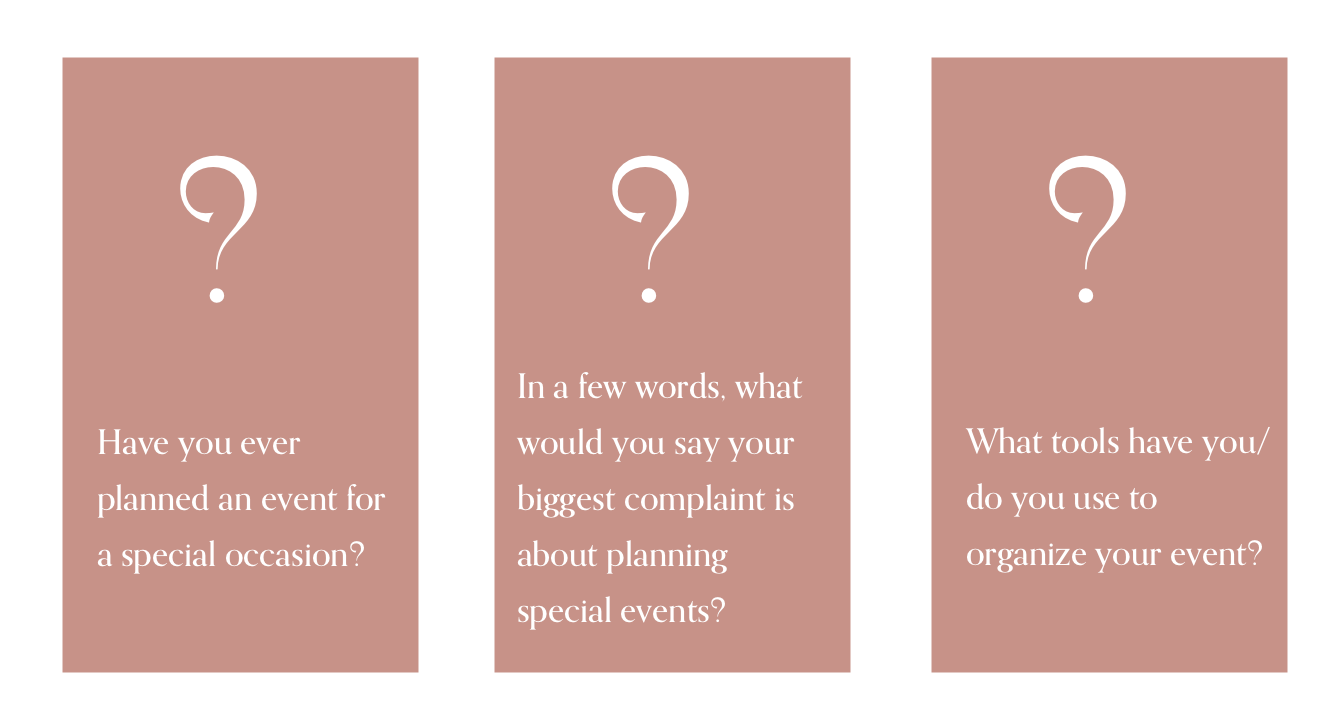
After reviewing all 30 responses, I learned a lot about the problems people faced when they plan special events. Some complaints included managing guest lists, keeping all their information organized, and executing the event in the desired way.
“Making sure that each and every detail has been considered.”
“Matching the vision of what the person the event is for wants.”
“Getting fix responses from people invited.
”
“Having all the details in one place in a user-friendly way.”
Result Analysis
My next step was to analyze the data that I had received from my survey's responses. To do so, I started with an affinity diagram
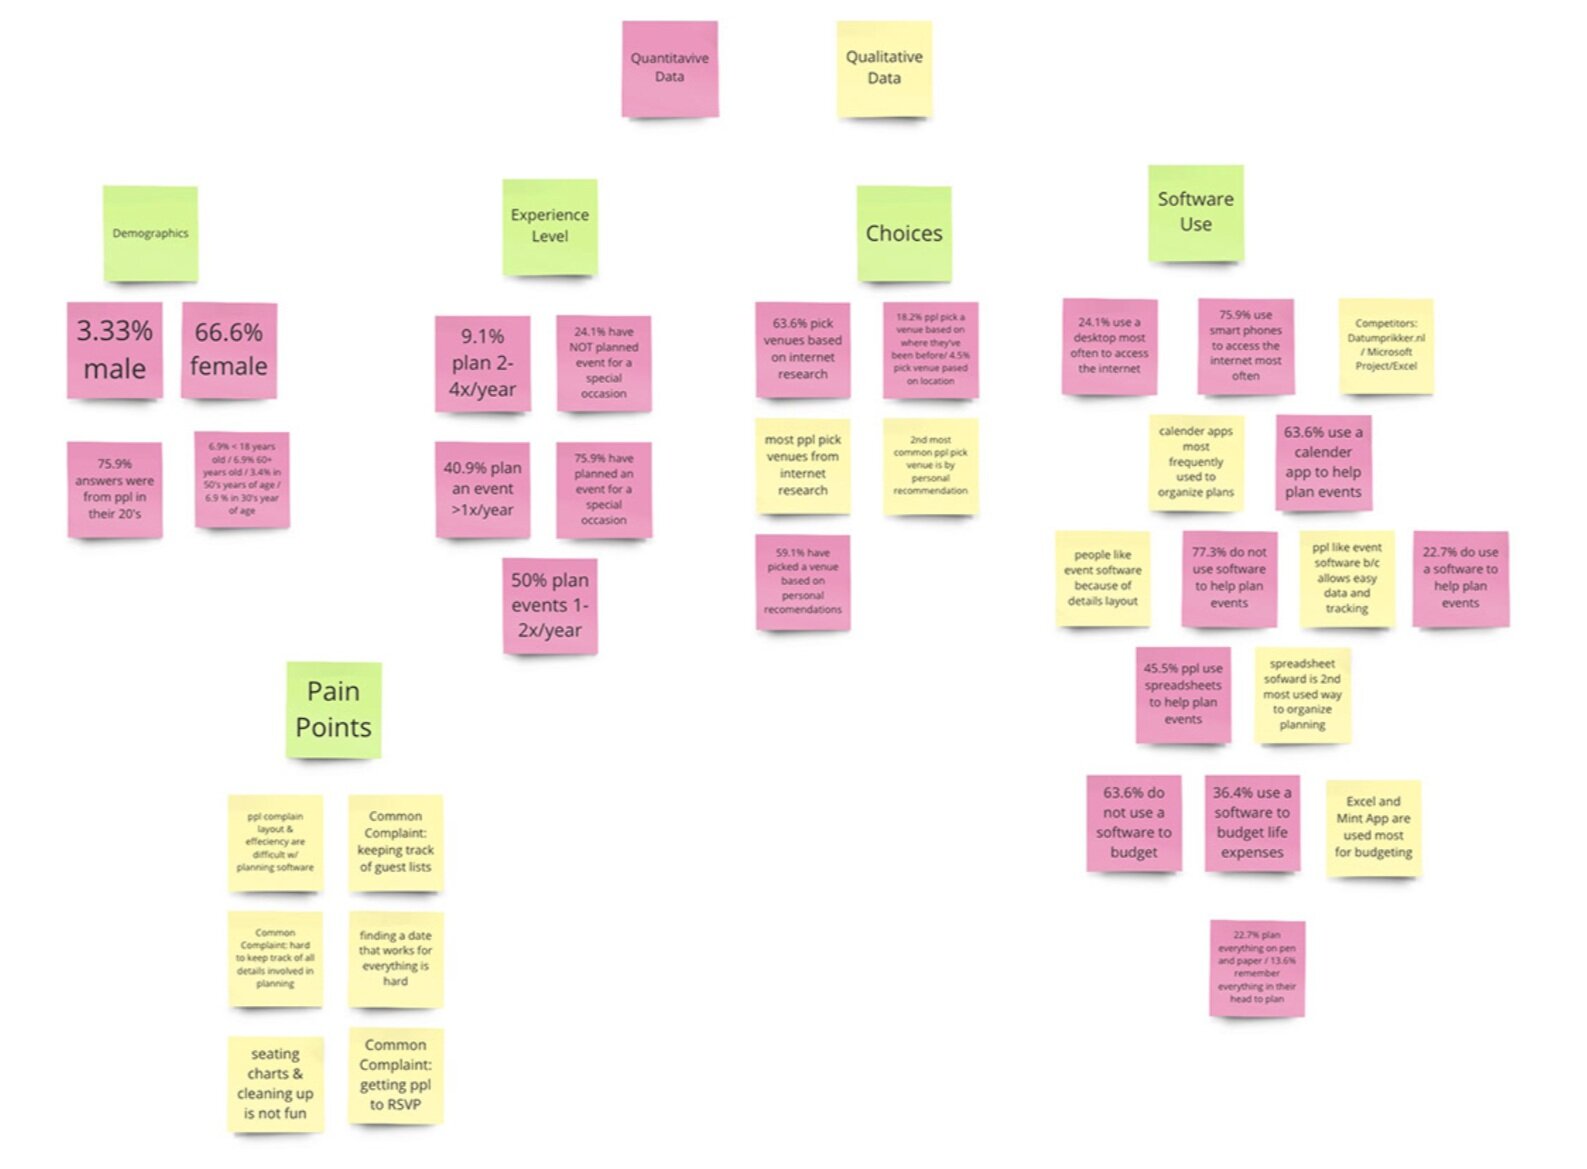
My next step was to analyze the data that I had received from my survey's responses. To do so, I started with an affinity diagram
Main Takeaways

User Persona
The next step was to build an imaginary use based on my research and analysis to target my product for.

MEET EMILY WHEATON
Meet Emily Wheaton: is a young public relations associate who enjoys socializing but hates wasting time.
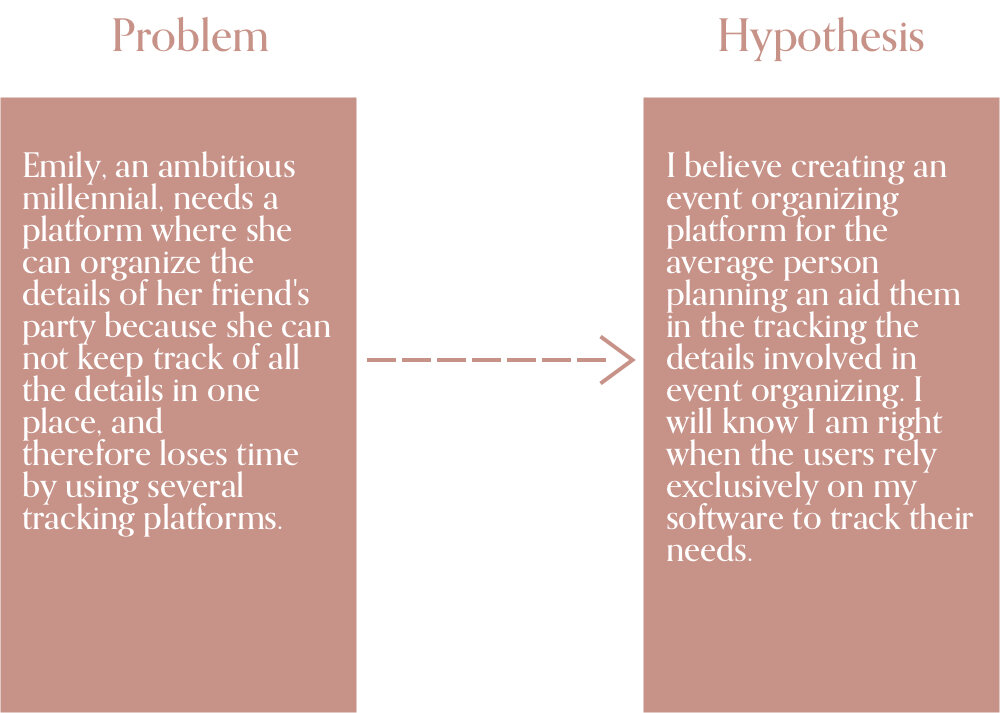
Identifying and Defining the Problem
Part 2: Ideation
Ideation was next. Now that I have my research collected and analyzed, as well as my problem defined, it was time for ideation!
Mind Map
I broke down my mind map into four main components: budgeting, guest list, time tracking, and guest experiences.

After breaking down these four staple components and all possible features they could entail, I had to narrow down the options for the sake of time. I had only one week to duct user experience process after all. This led me to my biggest challenge yet...
MoSCoW
My MoSCoW (Must have, Should have, Could have, Won't have) was next. I had to conduct the pain-staking process of breaking down what my product absolutely needed, and what was less necessary.

Site map
Now that the hard part of MOSCOW process of elimination was complete, I could map out my site. This is my favorite part because it organizes the components of my product into one cohesive visual.

Now that the hard part of MoSCoW process of elimination was complete, I could map out my site. This is my favorite part because it organizes the components of my product into one cohesive visual.
User Flow

I then had to create a scenario where my potential user (Emily) would navigate a specific task using my software. If all goes well, it is called a happy path. My path stemmed from the user journey (see above).
Wireframing
As I translated my paper prototype into wireframes, it became evident that certain components of my original design needed to be altered. For example, fitting three content-rich columns onto one screen would be difficult. Instead, I opted for creating two rows: the top with one large card and the bottom with two smaller cards. This improved my readability.
Part 3: User Interface Design
I was excited to start my the user interface (UI) half of my project. Although I found it to be fun, I also have to make some difficult decisions about my product's branding and aesthetic.
Mood Board

I started the UI process by asking myself, what impression do I want to give my potential users? After some deliberation, I composed a mood board to display the aesthetic I wish to share. It involves light pinks, yellows, and teal's to portray a celebratory mood. In addition, most of my images include objects identified with parties: balloons, fireworks, champagne, cake, etc.
Style Guide
After completing my mood board and curating the image I want my product to encompass, I created my product's style guide.

Because a style guide is a living document that is always changing, one can never fully expect the future of a product and therefore must always make changes to their products. However, in my first version, I included all of the visual components for the first high-fidelity components that I could anticipate:
Part 4: Final Design
After hours of pixel checking, symbol making, and making, I completed the first version of my product's high-resolution prototype. The demonstration is below.
Log in and Homepage
When the user first visits the site, they must first log in. Once they are logged in they can:
See all upcoming events
View past events
Event Creation
When the user wants to create a new event, they can click the button on the sidebar. From then they can:
Choose the occasion
Select the date and venue
Pick and customize an invitation
Invite friends via email
*If any of the information is TBD, the user can input it at a later time. The software will even update guests when these details are changed
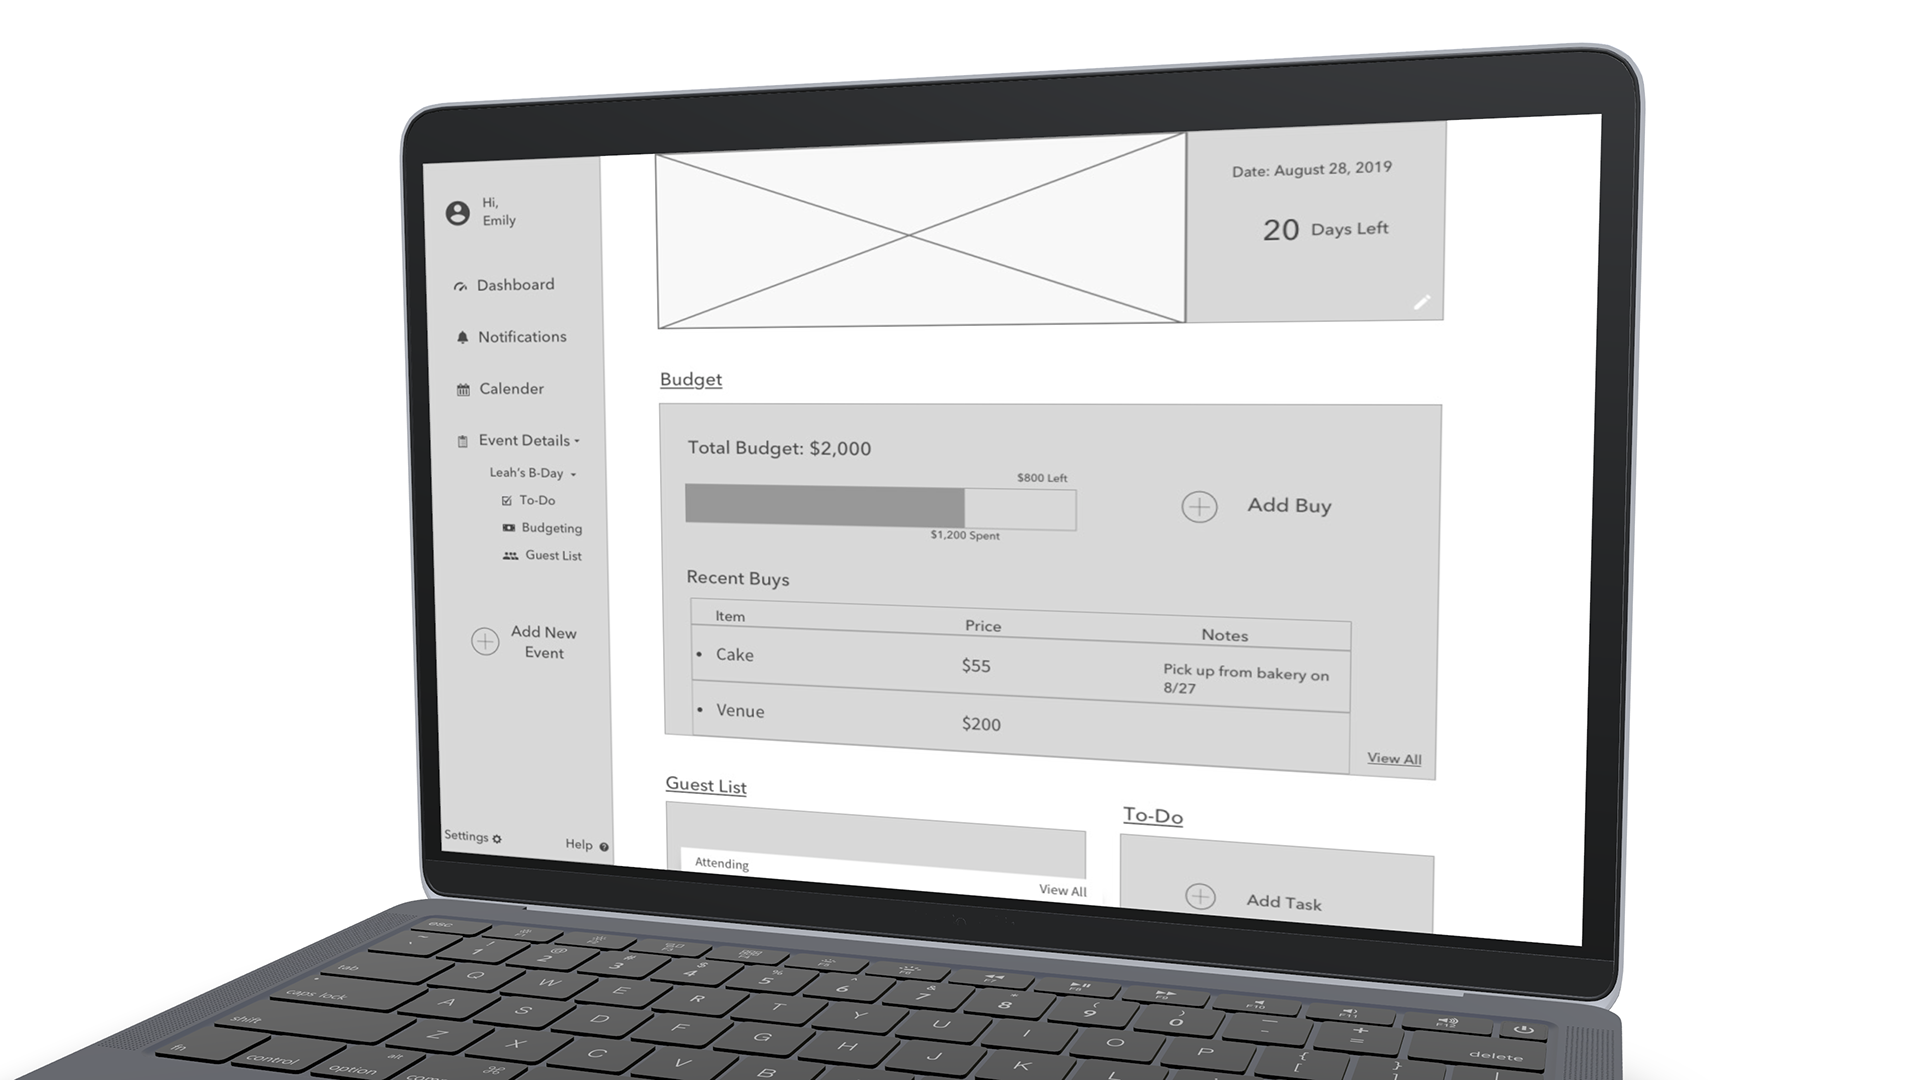
Event Page
When the user wants to view all the information on one coherent page, they can check the event overview page will include the fundamental details of the event including:
The budget
The guest list
The to-do list
Budget & To-Do Page
When the user wants to see a more detailed breakdown of their event budget and what still needs to be done, they can visit those individual pages.
On the budget page they can:
See how much they've spent and how much money they have left
Upload invoices for easy tracking
On the to-do page they can:
Add tasks to-do
Give tasks a due-date
Guest List Page
On the guest list page, users can:
View RSVP responses
Remind invitees to respond
Invite more guests via contacts
Preview and edit the invitation